1.svg)

 Home
Home Home cleaning
 1.svg) Business cleaning
Business cleaning Blog
Blog About us
 1.svg) Contact
Contact.svg) Bookings
Bookings Cleaning address
 Requisites (for business)
 1.svg) Contact details
Contact details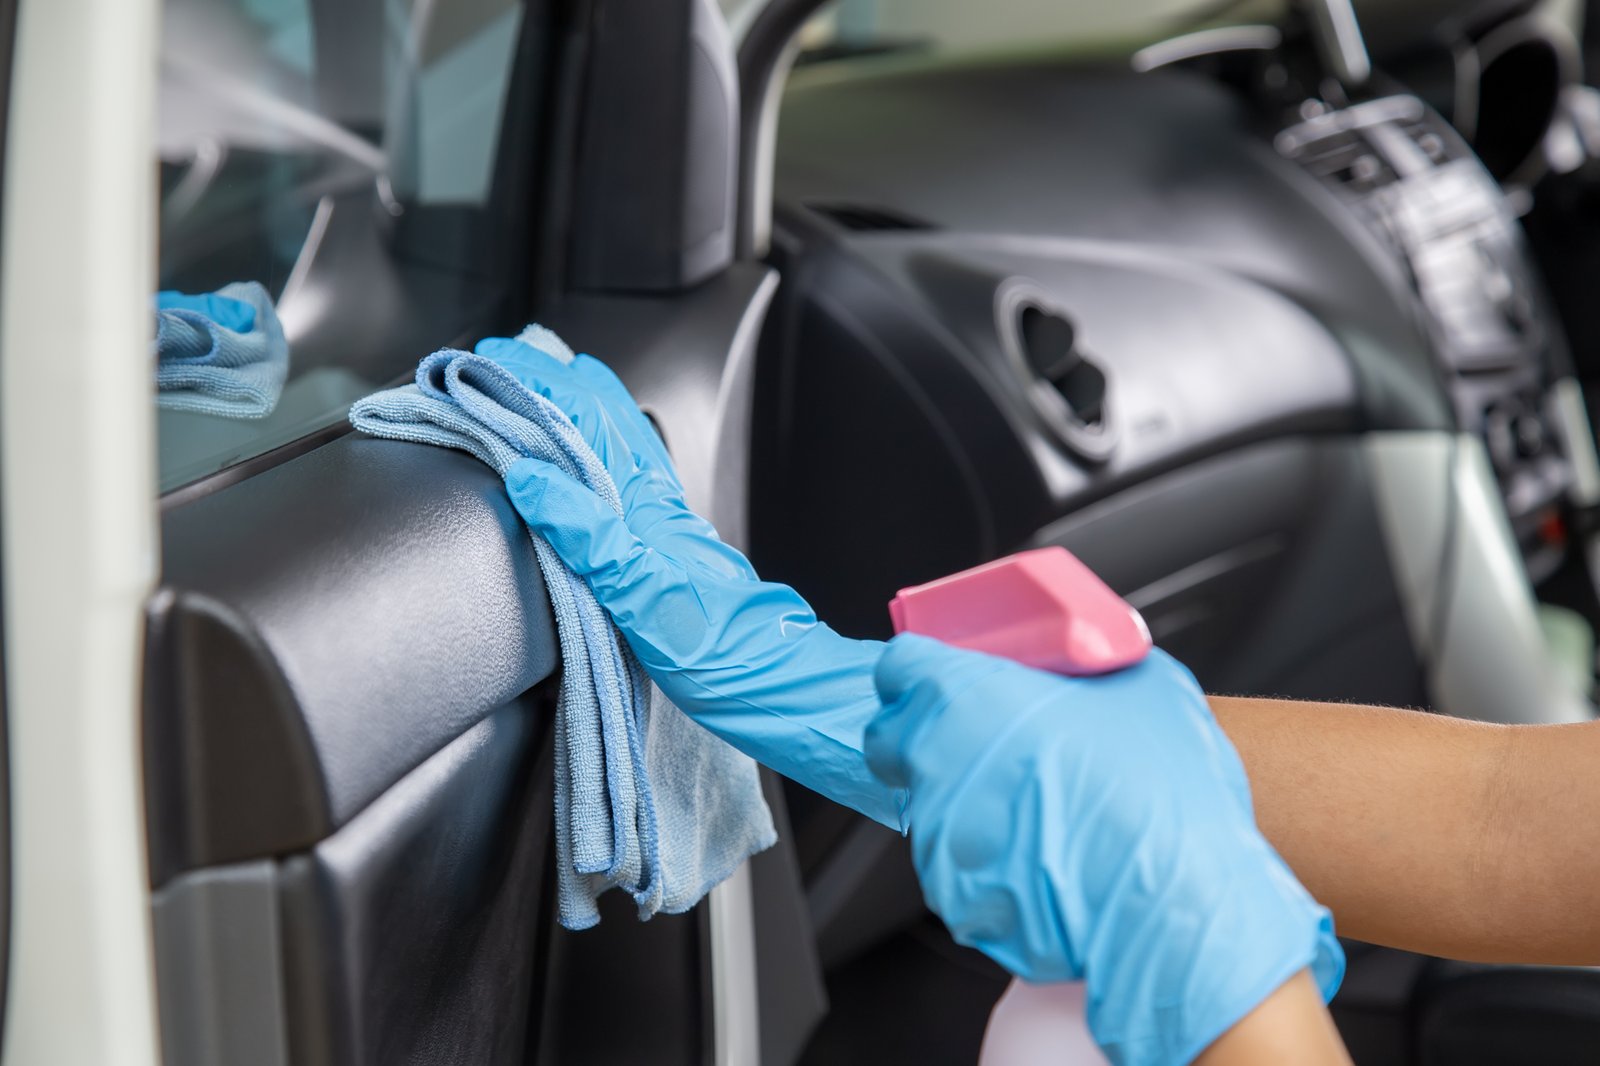
Every time you use your car there’s a chance that the interior will get scratched, scuffed or chipped. Damage is often caused by:
- Pets – dogs claws scratch the plastic of door panels or anywhere else the dog has access to
- Children – Kids scuff the plastic with their shoes and drop toys, play stations or phones, which can cause chipping
- Luggage and shopping – It’s easy to cause a scratch when putting items with sharp or hard edges into the car
Why does it matter?
Scuffs and scratches make the interior look tired and uncared for and if you want to sell the vehicle you’ll discover that a scruffy looking interior detracts from the car’s resale value. Removing scratches as they occur will keep the vehicle looking good and maintain the value.
This post is for you if:
- You’re a car owner who wants to learn how to remove scratches from plastic and damage from the interior of a car.
- You’ve just bought a secondhand car, want to smarten up the cabin area and need to know how to get scratches out of plastic
- You’re planning to sell your vehicle and need to know how to remove scuff marks from plastic car interior panels
Types of scratches
There are several sorts of damage that can be caused to plastic car interiors, they need different treatments to remove them:
- Scuffs – Scuff marks are caused when something, typically a shoe, boot or heavy piece of luggage is dragged across interior plastic. You’ll most often see them on the inside panels of car doors, the plastic panels between the seat and the door and on sill plates. Scuffs are usually superficial and relatively easy to remove.
- Scratches – Scratches are deeper than scuffs and penetrate into hard plastic panels. They can be caused by sharp objects in pockets, things like penknives or screwdrivers.
- Chips – Chips are caused when something hard knocks into plastic. They’re more common in older vehicles where the plastic has become brittle. If you do spot a chip and can find the tiny piece that’s been knocked off, save it. Keeping the old chip somewhere safe will make the repair job easier.
- Cracks – Depending on the initial quality of the materials used in the interior of the car, cracks can appear over time as the plastic starts to degrade. This process can be hastened by prolonged exposure to direct sunlight, so avoid parking in the sun if you can.
How to remove scratches from plastic on your own
Having the right tools is vital if you want to get a good result. Equipment you’re likely to need to remove scratches from plastic includes the following:
- Heat Gun or hairdryer – To soften plastic or vinyl making it easier to work
- Fine sandpaper – To remove imperfections and blend your repair into the original finish
- Microfiber towel – To remove dust, clean everything down once you’ve finished and apply finishing polishes
- Car interior cleaner – You should always start work on a surface that’s been freshly cleaned
- Toothpaste or baking soda – Either of these can be used as a super-fine abrasive
- Plastic Putty – Deep scratches may need to be filled. Plastic putty is ideal for the job
- Glue gun – For creating textured pads to match the surface for certain sorts of repairs
- DIY Dent Repair kit – These contain a variety of materials to help you get scratches out of plastic
Household tricks to remove scratches from plastic
Using toothpaste or baking soda – Clean the area with an interior car cleaner and wipe it dry using a microfibre towel. Put the toothpaste or baking powder onto a clean damp cloth and use it to polish the scratch out. Work in circular motions until the scratch disappears. Wipe the area clean and dry. This method works best on tiny superficial scratches or scuff marks.
Using several grades of sandpaper – Scratches that are a little too deep for toothpaste or baking powder can often be removed with fine sandpaper. Start by cleaning the area you’ll be working on then soak a piece of 800-grit sandpaper in water. Work using circular motions and the lightest of pressure. When you can no longer see the scratch clean the area with a damp cloth, then repeat the process with a finer sandpaper, 1200-grit is ideal. Clean with a damp cloth, dry the area then finish everything off with a plastic/acrylic polishing compound which will blend the repair in by restoring the original shine.
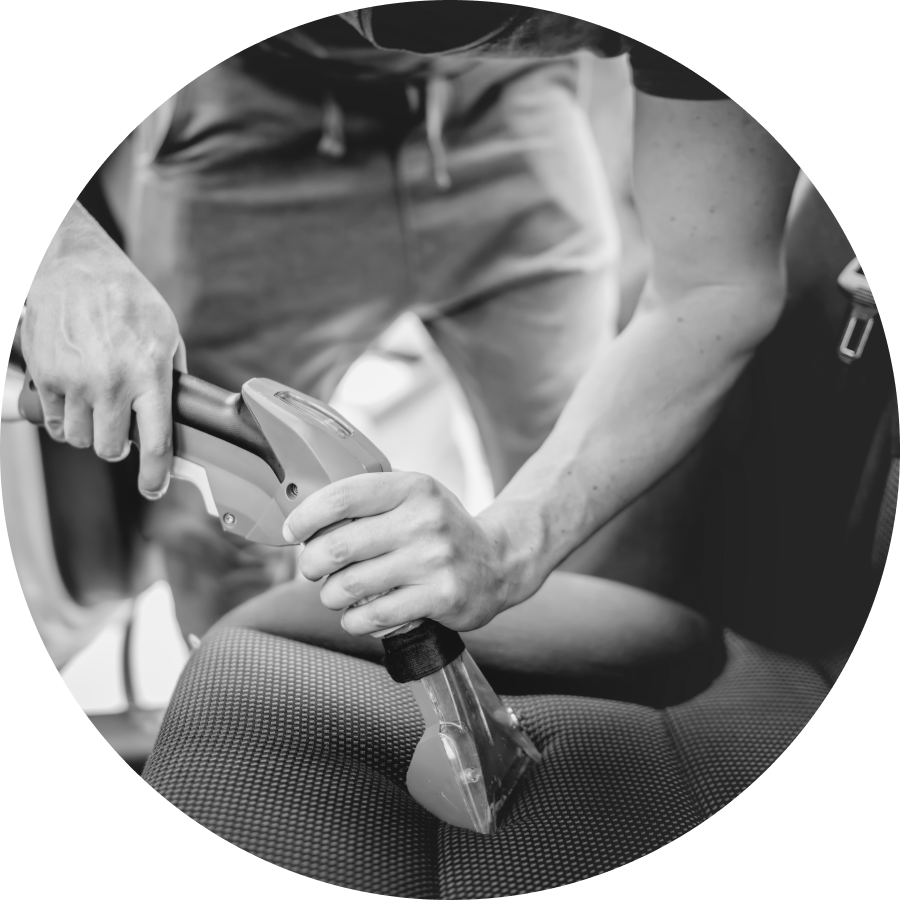
How to fix scratches on a plastic dashboard using a heat gun
You’ll need the heat gun or hairdryer, interior cleaner, sandpaper and a textured grain pad. You can buy grain pads online, select the texture that most closely resembles the finish on your dashboard. Start by cleaning the area using a microfibre cloth and interior car cleaner, when you’ve removed all the dirt wipe with a fresh cloth to make sure the area is perfectly clean and dry before you start to heat. Use a heat gun on half power, or a hairdryer at full power, keep the tool moving so that heat is evenly distributed over the surface you want to work on. Don’t overdo this stage, you want to heat the plastic just enough to soften it.
The moment that you see the plastic has lost its texture and is starting to look glossy you’re ready to apply the grain pad. Press this to the softened plastic and you should see the edges of the scratch join together and blend into the surrounding area. When you’re happy with the finish let the area cool and use fine sandpaper to smooth out any imperfections. Finish off by cleaning and polishing.
Use Filler Putty to get scratches out of plastic
This technique is more advanced than the ones described above, it’s used on deeper scratches where just sanding or heating and sanding will result in a dent. It’s easier to repair deep scratches if you can remove the panel. If you can’t, than mask the surrounding areas. Deep scratches generally have raised areas around them, you’ll need to remove these. A razor blade is ideal to remove protruding plastic, once you’ve done this sand the area to even the surface, clean with interior cleaner and dry the area with a microfibre cloth.
Next, make a grain pad which you’ll use to give the putty the correct texture. Create your pad by spraying an undamaged section of the panel with a surface sealant. Now apply glue from the glue gun onto a separate piece of plastic which is just bigger than the damaged area. Press the still warm but semi-set glue over the undamaged area you’ve treated with the surface sealant. The glue takes on the texture of the panel surface and as you’ve used the sealant you should be able to lift it off easily.
Apply putty to the damaged area, get it as even to the surface as you can then apply your homemade grain pad to the putty. The putty will now match the texture of the panel, once it’s dry you can spray it with paint that matches the colour.
Store-bought products for interior scratch repair
Rather than assembling all the materials you need to complete your car interior trim repair or dashboard scratch repair, you may find it easier to buy a kit or product designed for the job. There are various products designed for different jobs. Here’s a couple of the options available and some guidance on how to use them.
Car interior plastic repair kit
Kits generally include a plastic cleaner, a polishing compound, microfiber cloths, and polishing or buffing pads. You start by sanding down the area with fine sandpaper, spraying the surface with the cleaner supplied and wiping off with the microfibre cloths. Use the pads to apply the polishing compound to the scratched areas, working the polish into the damaged areas generously. Once you’ve worked the polish into the scratches apply another lighter layer over the scratch and surrounding area, let it dry then buff off using a fresh microfibre cloth.
Some kits also include a rubbing compound. If this is supplied use it in place of sandpaper for the first stage then proceed through the rest of the steps as described above.
Using magic sponge to fix scuff marks
Magic sponge was developed for insulation but its fine abrasive properties make it ideal for removing scuff marks. To use magic sponge you simply dip it in water or trim cleaner and rub it over the scuffed area until the marks disappear. Finish off by wiping a clean, damp cloth over the area to remove any dust or fine residue then dry off with a fresh, dry cloth.
Replacement of the damaged part
If the scratches can’t be removed you either have to live with them or replace the piece of panel or trim. Replacing trim can be expensive, extra tools and skills are required to remove the old part and fit the new. It can also be hard to find a replacement part that will blend in with your existing interior as new parts are likely to stand out and second-hand ones may not be an exact match and could also be scuffed or scratched.
How to prevent scratches
There’s only so much you can do to prevent scratches while still making full use of your car but a few things that might be helpful include:
- Not allowing young children to use hard toys in the car
- Removing clothing with metal parts (coats or workwear) before getting in the car
- Changing shoes as you enter so that you don’t carry sand or other abrasives into the car interior
- Keeping pets in travel cages or at least limiting which areas of the car they have access too