


 1.svg)

 Home
Home Home cleaning
 1.svg) Business cleaning
Business cleaning Blog
Blog About us
 1.svg) Contact
Contact.svg) Bookings
Bookings Cleaning address
 Requisites (for business)
 1.svg) Contact details
Contact details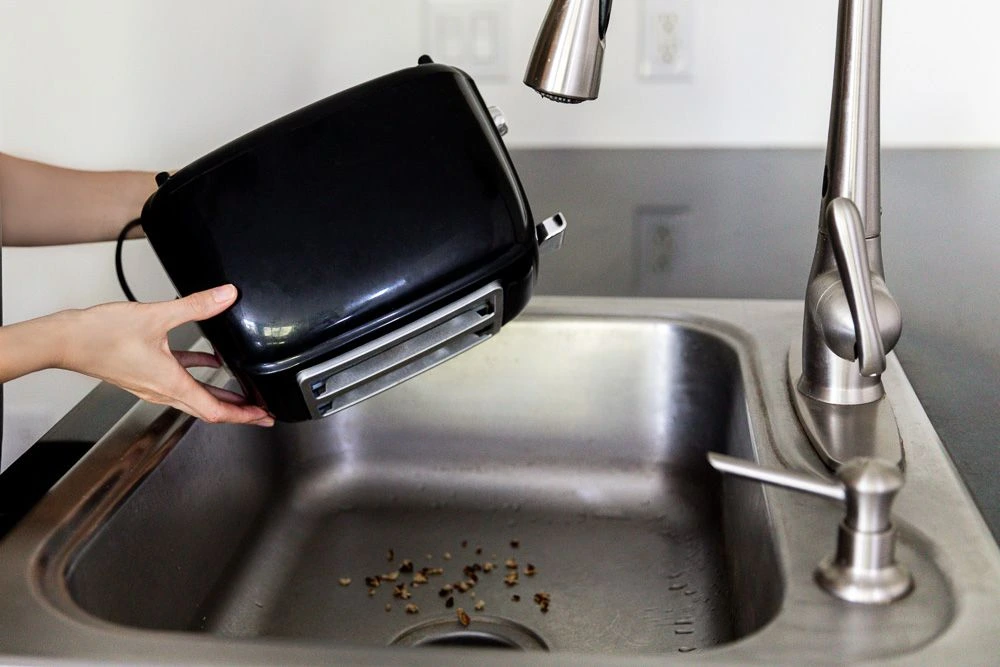
Cleaning the inside of your toaster is essential for maintaining its performance and preventing the buildup of crumbs and grease, which can lead to unpleasant odors or even fire hazards. Here’s a detailed guide on how to safely clean your toaster without damaging it.
Step 1: Unplug the Toaster
Before you begin cleaning, unplug the toaster from the wall outlet. This ensures your safety and prevents any accidental activation while you’re cleaning.
Step 2: Remove Crumb Tray
Most toasters have a removable crumb tray located at the bottom. Here’s how to clean it:
- Locate the Crumb Tray: Check the bottom of your toaster for the crumb tray. It may slide out or be attached with a latch.
- Empty the Tray: Pull the tray out gently and empty any crumbs into the trash.
- Wash the Tray: Clean the tray with warm, soapy water. Use a sponge or dishcloth to scrub away any grease or residue. Rinse it thoroughly and let it dry completely before reattaching it to the toaster.
Step 3: Shake Out Loose Crumbs
To clean the inside of the toaster, you need to remove any loose crumbs.
- Turn the Toaster Upside Down: With the toaster unplugged, carefully turn it upside down over a clean surface or a sink.
- Shake Gently: Gently shake the toaster to dislodge any remaining crumbs. Be cautious not to shake too hard to avoid damaging any internal components.
Step 4: Clean the Interior
Now that you’ve removed the crumbs, it’s time to clean the interior surfaces.
For Light Cleaning:
- Dampen a Cloth: Take a soft, damp cloth (not soaking) and wipe the interior surfaces of the toaster. Avoid using any harsh chemicals or abrasives.
- Remove Stains: If there are stubborn stains or residue, use a mixture of water and a mild dish soap on the cloth to scrub gently.
- Avoid the Heating Elements: Be careful not to get water on the heating elements or any electrical parts inside the toaster.
For Deeper Cleaning:
- Use a Toothbrush: For harder-to-reach areas, you can use a soft-bristle toothbrush or a paintbrush to gently scrub away any crumbs or debris.
- Dampen with Vinegar: If there are tough stains, you can lightly dampen a cloth with white vinegar and gently wipe the stained areas.
Step 5: Clean the Exterior
Don’t forget to clean the exterior of the toaster to remove fingerprints and smudges.
- Wipe Down the Surface: Use a damp cloth to wipe the exterior of the toaster. For stainless steel surfaces, a mixture of vinegar and water can help restore shine.
- Dry Thoroughly: Ensure that you dry the exterior with a clean towel.
Step 6: Reassemble the Toaster
Once everything is clean and dry:
- Replace the Crumb Tray: Slide the crumb tray back into place.
- Plug the Toaster Back In: Once you’re sure everything is dry, plug the toaster back into the outlet.
Step 7: Regular Maintenance
To keep your toaster in good condition, consider these tips:
- Clean Regularly: Aim to clean the crumb tray weekly and perform a deeper clean monthly.
- Avoid Overloading: Don’t overload your toaster with too much bread or other items, as this can cause crumbs to build up faster.
- Monitor for Odors: If you notice any burnt smells while using the toaster, it may indicate that it’s time for a thorough cleaning.
Conclusion
Cleaning the inside of your toaster is a simple yet essential task that helps maintain its performance and safety. By following these steps, you can keep your toaster clean and in good working order, ensuring that it continues to toast your bread perfectly for years to come.
